Reproducing the Alien Access Tuner minigame from the Alien Isolation video game
Show Table of Contents
Preface
I've been a fan of the Alien franchise for a long while now. I vaguelly recall the first time I got introduced to it was when my cousin showed me (a 10-something-year-old boy) and my little brother the original Alien movie from 1979 (in VHS cassette no less!). Back then, I couldn't really fully appreciate the retrofuturistic aesthetic and just how well-made and ahead of its time the movie was. To me, it just seemed like a regular old title but rather dark (full of static noise too 😅), and with a fair share of cursing. Nowadays however, I have lost count just how many times I have rewatched the original Alien movie. I'll be frank: the rest of the franchise just doesn't shine as bright as the first movie. All the remaining titles do bring their own flair, e.g. the heavy military theme and happy-trigger shooting in Aliens, or the colonial-themed Prometheus. Some movies were mild successes, some were disappointingly bad, but none, in my opinion, reach the talons of the original Alien movie from 1979 with its strong leading character, Ellen Ripley, portrayed by the de facto Queen of Sci-Fi Sigourney Weaver.
Beyond cinema, the franchise has also been interpreted and implemented in the video game industry countless times. I've tried a few but always found them lacklustre or just plain-old shoot'em all video games, which I am not particularly fond of. However, in 2014, Creative Assembly released Alien Isolation to the general public. The game is an absolute masterclass in psychological terror and survival: it constantly keeps you on your toes, but does so in smart and creative ways. The original score is clearly carefully thought of, replicating the tone and ambiance of the original movie from the franchise, all the while aiming to set its own tone, keeping all the mechanical bleeps and thuds we love. Visually, the game looks stunning. Clearly, the art direction of the game was done with Alien (1979) in mind. The retrofuturism is omnipresent, the colour palette is, in general, dark and somber, contrasted by the bright and glowing colours present in old school CRT1 displays in-game, and other hallogen and incandescent lighting.
The video game includes a wide range of mechanics, including the famous motion tracker, and in particular, they introduced an "access tuner" to the game. This device allows you to hack through sealed doors in the form of minigames. I loved the feeling and look of the access tuner and wanted to replicate one of the minigames myself to perhaps later embed in a piece of electronics, itself embedded in a 3D-printed access tuner model. This blog post showcases my attempt to build the software part of this project. I hope you enjoy it! 👽
Goal
In a nutshell, we will try to emulate the feel and look of the Access Tuner item in the Alien Isolation (2014) video game. To do this, I picked the following libraries in Python:
Both libraries are well-established in the Python gamedev and array processing landscapes.
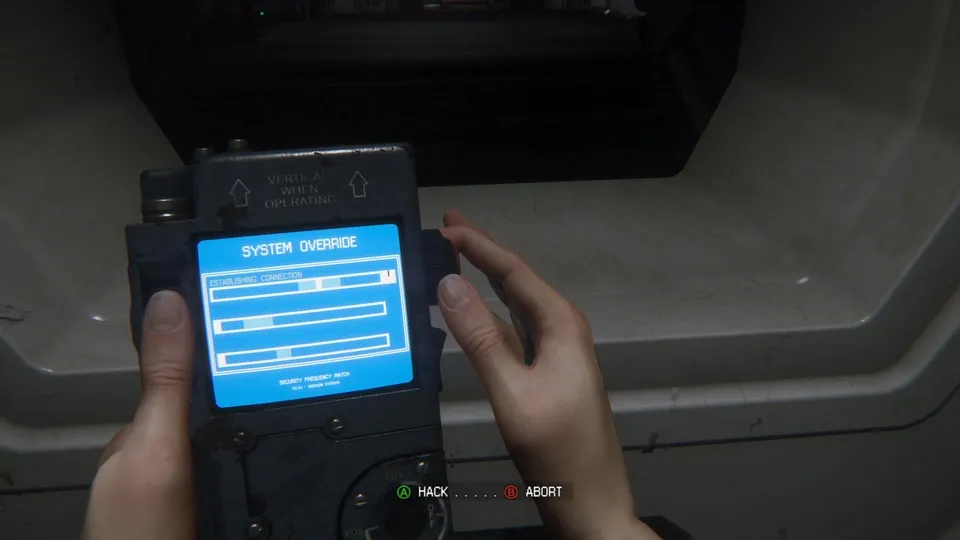
Access Tuner in Alien Isolation.
Implementation
In this blog post, I will only address the visual effects implementation. In order to replicate the aesthetic of the access tuner as close as possible, we need to think a bit about CRT displays. If you were born in the past century, you may recall how noisy CRT screens were, when compared to more recent displays with the advent of LCD2 and LED3 technologies and their widespread use in all aspects of modern life. CRT displays are known for being more prone to noise and interference, with a range of visual effects that characterise it. Let's try to list some of them and implement them in our minigame clone.
Visual effects
The access tuner features several visual effects to mimic the in-game experience:
- Bloom: pixels have a bloom effect to enhance the visual appeal and replicate old CRT displays
- Flickering: screen flickers intermittently to simulate an old, malfunctioning device
- Signal interference: random signal interference (horizontal) lines appear on the screen
- Static noise: static noise is applied to the screen to give it a more authentic, aged look
🗒️ Note: all implemented visual effects are triggered based on a continuous uniform distribution.
Bloom
Bloom is a visual effect that creates a glow around brighter areas of the screen, simulating the way light spreads on CRT displays. It gives a more vibrant and dynamic look to the display. In the context of CRT screens, bloom occurs due to the scattering of light within the phosphor layer of the screen, causing bright pixels to bleed into adjacent areas (how cool is that!? 😎). Let's try to implement that in our minigame!
First things first, we need to set a baseline (ranging from 0 to 255, i.e. 8-bit colour depth). In our case, I set baseline = 200, the baseline brightness value. We also need to create a new surface, bloom_surface, with the same size as the screen and filled with a transparent colour, i.e. RGBA: (0, 0, 0, 0) in which the last value is the alpha value representing opacity.
baseline = 200
bloom_surface = pygame.Surface(self._screen.get_size()).convert_alpha()
bloom_surface.fill((0, 0, 0, 0))
Next, the pixel arrays for the screen and the bloom surface are obtained using pygame.surfarray.pixels3d and pygame.surfarray.pixels_alpha. These arrays allow direct manipulation of the pixel data. The bright_mask is then created by checking which pixels in the screen have RGB values greater than the baseline. This mask identifies the bright areas of the screen. The bright pixels from the screen are copied to the bloom surface using the bright_mask. The corresponding alpha values are also copied to maintain transparency information.
pixels = pygame.surfarray.pixels3d(self._screen)
alpha = pygame.surfarray.pixels_alpha(self._screen)
bloom_pixels = pygame.surfarray.pixels3d(bloom_surface)
bloom_alpha = pygame.surfarray.pixels_alpha(bloom_surface)

bright_mask = (
    (pixels[:, :, 0] > baseline)
    & (pixels[:, :, 1] > baseline)
    & (pixels[:, :, 2] > baseline)
)
bloom_pixels[bright_mask] = pixels[bright_mask]
bloom_alpha[bright_mask] = alpha[bright_mask]
After copying the bright pixels, the pixel arrays are deleted to free up memory. The bloom effect is then scaled down and up to create a blur effect. The bloom_factor is set to 0.75, and the bloom surface is scaled down to 75% of the original resolution using pygame.transform.smoothscale. It is then scaled back up to the original resolution.
del pixels, alpha, bloom_pixels, bloom_alpha

bloom_factor = 0.75
small_bloom_surface = pygame.transform.smoothscale(
    bloom_surface,
    (
        int(Resolution.WIDTH * bloom_factor),
        int(Resolution.HEIGHT * bloom_factor),
    ),
)
bloom_surface = pygame.transform.smoothscale(
    small_bloom_surface, (Resolution.WIDTH, Resolution.HEIGHT)
)
Finally, the bloom surface is blitted onto the screen with the pygame.BLEND_RGB_ADD flag, which adds the RGB values of the bloom surface to the screen, creating the glowing effect. This completes the bloom effect rendering process.
self._screen.blit(bloom_surface, (0, 0), special_flags=pygame.BLEND_RGB_ADD)
If this seems a bit intimidating at first, don't worry. There's a lot of "pygame-specific" code in here 🙂
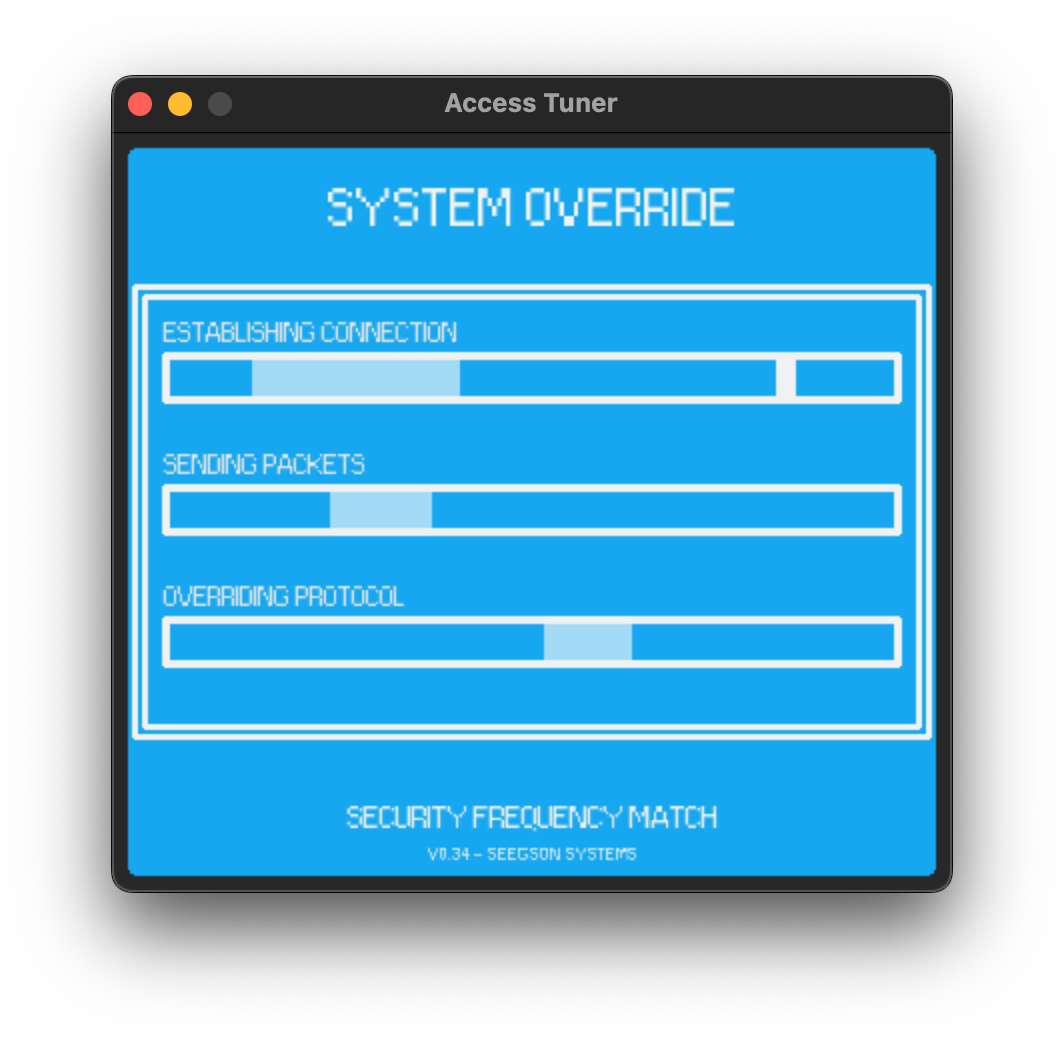
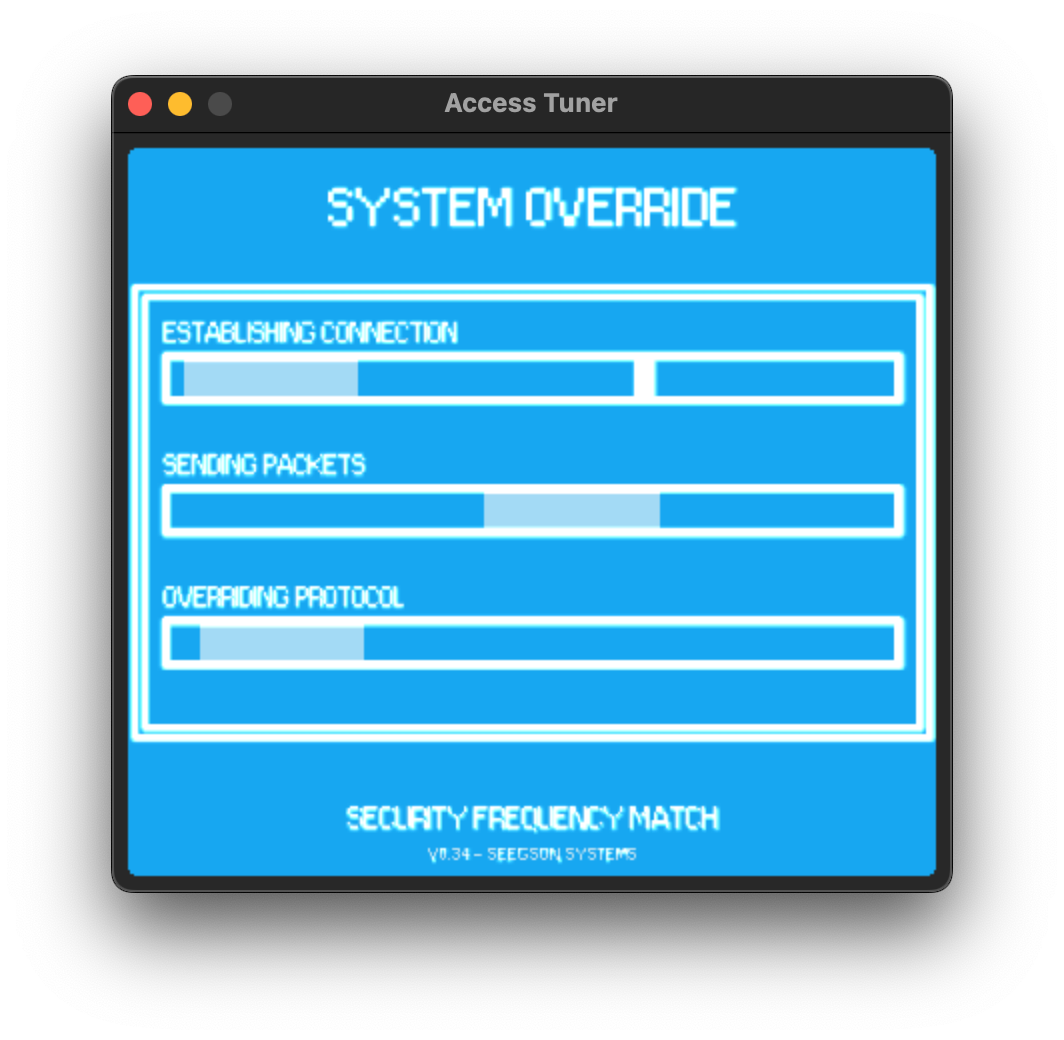
Before and after implementing the bloom effect (from left to right).
Flickering
Screen flickering refers to the rapid, repetitive flashing or blinking of the display. In the context of CRT displays, screen flickering occurs when the electron beam's refresh rate fails to synchronize properly with the display's vertical scanning frequency, causing visible, rapid fluctuations in the image. Let's take a look at our implementation:
self.dropout = 0.05
if random.random() < self.dropout:
    blackout = pygame.Surface((Resolution.WIDTH, Resolution.HEIGHT))
    blackout.fill(random.choice([Colors.BLACK, Colors.BLUE]))
    blackout.set_alpha(random.randint(0, 255))
    self._screen.blit(blackout, (0, 0))
First, we declare self.dropout and set it to 0.05, representing a 5% probability for flickering to occur. The random.random() method generates a random float between 0 and 1. If this random value is less than self.dropout (i.e., there is a 5% chance), the following block of code is executed.
Within this block, a new Surface object (blackout) is created with the dimensions specified by Resolution.WIDTH and Resolution.HEIGHT. This surface is then filled with a randomly chosen color, either black or blue, from the Colors enum. The set_alpha method is then used to set the transparency level of the blackout surface to a random integer between 0 (completely transparent) and 255 (completely opaque).
Finally, the blackout surface is blitted onto self._screen at the coordinates (0, 0), effectively overlaying the blackout surface onto the screen. This way, we can effectively emulate screen flickering as seen in CRT displays.
Signal interference
I'm using "signal interference" as an umbrella term for the following visual effects (which are fairly simple to implement):
- Colour distortion: slightly modify the RGB channels at random pixels
- Horizontal shifting: shift all the pixels to the left or the right within a given range
- Tracking lines: add horizontal ranges of varying heights in random colours (blue, green, or white)
Static noise
Lastly, we look into adding static noise, a defining trait of VHS 📼 recordings. In essence, we need to go over three steps:
- Generate random noise:
Here we generate a random noise factor based on a uniform distribution given in the range [self.noise / 2, self.noise].
noise = random.uniform(self.noise / 2, self.noise)
- Set individual pixels:
Next, we set random pixels on the screen to random shades of gray (i.e. ranging from dark gray to white). The range for the number of pixels to be affected is calculated as Resolution.WIDTH * Resolution.HEIGHT * noise, which represents the total number of pixels on the screen multiplied by the noise density. This ensures that the amount of static noise is proportional to the screen size and the specified noise level.
for _ in range(int(Resolution.WIDTH * Resolution.HEIGHT * noise)):
    x = random.randint(0, Resolution.WIDTH - 1)
    y = random.randint(0, Resolution.HEIGHT - 1)
    self._screen.set_at((x, y), random.choice([Colors.GRAY, Colors.DARK_GRAY, Colors.LIGHT_GRAY, Colors.WHITE]))
- Add occasional horizontal lines:
Finally, we randomly add some horizontal lines of varying lengths, starting from a random pixel, based on a 2% probability of occurence (0.02).
if random.random() < 0.02:
    length = int(random.normalvariate(8, 4))
    if length > 0:
        for i in range(length):
            if x + i < Resolution.WIDTH:
                self._screen.set_at((x + i, y), random.choice([Colors.GRAY, Colors.DARK_GRAY, Colors.LIGHT_GRAY, Colors.WHITE]))
Outro
This was a fun little experiment project I built over the Christmas period. It has no utility whatsoever, but it was rewarding to see how we can emulate old-school displays with not-so-clever algorithms 🤓 If I have some spare change this year, I may drop this code into a Raspberry Pi and order a 3D model of the access tuner from Thingiverse.
Feel free to have a look at the repository to check out the code a bit more in depth! 👽